Create Thumbnail Images Of Your Larger Images


Why Use Thumbnails ?

Thumbnail images on a web page do three things for you:

  • One, the smaller file size of the thumbnail images reduces the overall load time of the web page.
  • Second, thumbnails save you space on your web page. Instead of having two or three large images displaying on your web page, you can have many thumbnail images and allow the viewer to pick and choose which ones they would like to see in a larger version.
  • Last, but by far not the least, using thumbnail images will save costly bandwidth that either you are paying or the free web host you are using is paying for. Either way, saving bandwidth is a good thing.

The Images

To create a true thumbnail you will need two images. The first image is the larger version of the image, the one the viewer will see when they click on the smaller thumbnail image. The second image will be a smaller version of the image (75 to 100 pixels in width will do).

If you do not create a smaller version of the image and just resize the image using Html to a smaller sized image, you will be loading the larger file size onto your page, thus defeating the purpose of using a thumbnail image.

You will need a graphics software program to resize your images. I suggest Paint Shop Pro, it is free to download and use for 30 days but well worth buying ($52.99 at Amazon). Other graphic programs like Adobe Photoshop are excellent but will cost you quite a bit of money (around $600.00).

You can also resize an image using an online graphic program like GifWorks (if your image is in the GIF format) or Image Magick which will resize GIF and JPG. I myself prefer using computer graphic software to resize an image, I feel the results are much better, but that is just my opinion.

Creating The Thumbnail

Once you have your two images (one the larger size and one resized to a smaller version), you are ready to create your thumbnail image on your web page.

Here are the two images we will be using in this lesson:
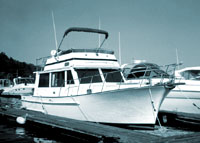
Large Version
boat.jpg
200 X 143 Pixels
Small Version
boat-small.jpg
100 X 71 Pixels

First create a link to the larger image:

<a href="boat.jpg"></a>

Next add the smaller image into the link so it can be clicked on to view the larger image. Don't forget to include the "width and "height" of the thumbnail image (it will help it load faster). Also add border="0" so there is not a highlight box around your thumbnail image (if this is what you desire).

<a href="boat.jpg"><img src="boat-small.jpg" width="100" height="71" border="0"> </a>

Here are the results of our thumbnail code, click on the small boat image to see the larger boat image. Use your "Back" button to return here.

It's as simple as that to create a thumbnail image on your web page. Now if you desire to have many thumbnail images on your web page it is best to set up a table to organize all your thumbnail images. I have set up a number of thumbnail images in a "table" on the next page and have provided the Html code for you to copy and paste. So click the thumbnail image of the web page below to see this sample table of thumbnail images.

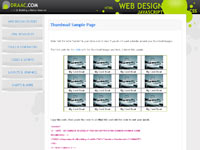
Click To See The Sample Thumbnail Page

PS: If you were wondering how I created that thumbnail image of a web page, it was taken with Paint Shop Pro's capture feature. The capture feature will allow you to take a snapshot of anything on your computer and turn it into an image. A very handy tool to have around...:+)